One of the main reasons for creating a child theme is to separate your custom changes from the main theme. A child theme sits on top of a parent theme and the custom file take precedence over the parent theme files. If you edit an existing theme any changes will be lost when the theme is updated. With a child theme, whenever the parent theme is updated (enhancement, security or functionality), your changes remain.
How to Create a Child Theme
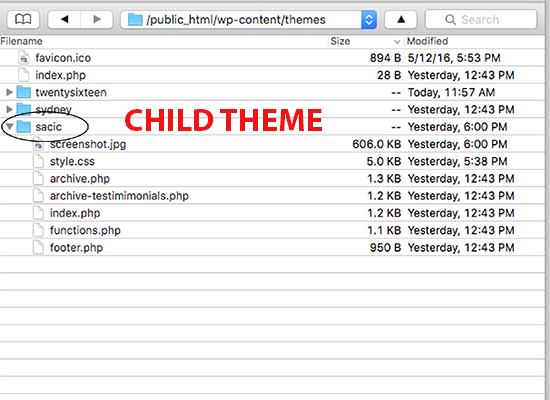
First create a new folder in your themes directory: wp-content/themes. This can be done through FTP or your File Manager in your cPanel. The folder name for the chid theme is a single word, no spaces. I prefer to name my child theme based on the website name to identify it as a custom child theme specifically for the website.
In the child theme folder, create a file called style.css and a file called functions.php. These are the only two files required to make a child theme. Based on the Cascading Style Sheet methodology, the child theme’s stylesheet is loaded after the parent theme’s and styles will be added or override those in the parent theme’s stylesheet.
Note: The folder name is not used in the header. The child “Theme Name” may be different from the folder name and will be displayed in the Themes panel and Editor panel.
The standard header for a child theme:
/*
 Theme Name:   Twenty Sixteen Child
 Theme URI:    http://example.com/twenty-sixteen-child/
 Description:  Twenty Sixteen Child Theme
 Author:       John Doe
 Author URI:   http://example.com
 Template:     twentysixteen
 Version:      1.0.0
 License:      GNU General Public License v2 or later
 License URI:  http://www.gnu.org/licenses/gpl-2.0.html
 Tags:         responsive-layout, accessibility-ready
 Text Domain:  twenty-sixteen-child
*/
The only required lines are in bold: the Theme Name and the Template:
/*
 Theme Name: Sacramento Internet Consultant
 Description:  Custom child theme based on Twenty Sixteen
 Author:       JoAnne Obata
 Author URI:   https://sacinternetconsultant.com
 Template:     twentysixteen
*/

/* =Theme customization starts here
-------------------------------------------------------------- */
The Template is the directory name of the parent theme.
Best practices now is to enqueue styles correctly in the functions.php file instead of adding the ‘@import url’ line to the style.css file because it minimizes the time to load style sheets.
The following example for functions.php file will work if your Parent Theme uses only one main style.css. If your theme has more than one .css file (eg. ie.css, style.css, main.css) then you will have to make sure to maintain all of the Parent Theme dependencies.
The following example for functions.php file will work if your Parent Theme uses only multiple style sheets. In this example, we have style.css and mediaqueries.css.
function my_theme_enqueue_styles() {
    wp_enqueue_style( 'parent-style', get_template_directory_uri() . '/style.css' );
    wp_enqueue_style( 'parent-mediaqueries', get_template_directory_uri() . '/mediaqueries.css', array(), '' );
    wp_enqueue_style( 'child-style', get_stylesheet_directory_uri() . '/style.css',
array('parent-style')
    );
}
add_action( 'wp_enqueue_scripts', 'my_theme_enqueue_styles' );
To activate the child theme, select the child theme that you just created from Themes: Log in to your site’s dashboard, and go to Administration Panels > Appearance > Themes. You will see your child theme listed there. Click Activate.
To make an image for your child theme, take a screenshot of your screen, resize to 880 x 660, rename to screenshot.png or screenshot.jpg. Upload the image file to your child theme folder.